Balconies are wonderful spaces that provide an outdoor retreat within the comfort of your home. However, when water starts seeping through, balcony leaks can quickly turn into a frustrating and potentially damaging problem. In this post, we’ll explore the causes of balcony leaks and the potential damages they can cause, highlighting the importance of addressing this issue promptly.
Causes of Balcony Leaks:
Poor Waterproofing: Inadequate or deteriorated waterproofing is one of the primary causes of balcony leaks. Over time, exposure to the elements, temperature fluctuations, and general wear and tear can compromise the waterproofing membrane, allowing water to penetrate through cracks and gaps.
Faulty Construction: Balconies that were poorly constructed or not built to code may be prone to leaks. Insufficient sloping to allow proper drainage, improper installation of flashings and seals, or inadequate use of waterproofing materials can all contribute to water infiltration.
Damaged Seals and Joints: Balconies have various seals and joints that help prevent water from entering. However, these seals can deteriorate over time due to age, exposure to UV rays, and weather conditions. Cracked or damaged seals and joints can create entry points for water, leading to leaks.
Structural Movement: Buildings naturally experience some degree of movement due to settling or changes in temperature and humidity. If a balcony is not properly designed or lacks flexibility to accommodate these movements, it can develop cracks or separations that allow water infiltration.
Potential Damages Caused by Balcony Leaks:
Structural Damage: Water seeping into the balcony structure can lead to structural deterioration over time. Moisture can weaken the materials, causing rot, corrosion, or decay, compromising the integrity of the balcony and even the surrounding areas.
Interior Damage: Balcony leaks can result in water seeping into the interior spaces of your home. This can damage walls, ceilings, and floors, leading to stains, discoloration, peeling paint, and even mold growth. Mold can pose health risks and require extensive remediation efforts.
Safety Hazards: Leaking balconies can create slip and fall hazards, especially if water accumulates on the balcony surface or spills onto adjacent areas. Slippery surfaces can increase the risk of accidents, potentially causing injuries to occupants or visitors.
Addressing balcony leaks promptly is crucial to prevent further damage and maintain the safety and integrity of your home. Understanding the common causes of balcony leaks, such as poor waterproofing, faulty construction, damaged seals, and structural movement, can help you identify potential issues. If you notice signs of balcony leaks, such as water stains, dampness, or visible cracks, it’s essential to consult with a professional to assess the extent of the problem and carry out necessary repairs. By addressing balcony leaks promptly, you can protect your property from structural damage, interior water damage, and potential safety hazards, ensuring your balcony remains a cherished and secure space.
Fixing Balcony Leaks: Regrouting with Epoxy Grout
Dealing with balcony leaks can be a frustrating experience, but there are various methods available to address the issue. In this post, we’ll explore one cost-effective option: regrouting the balcony with epoxy grout. While it’s important to note that this method may not provide a guaranteed solution for all cases, it can be a viable and budget-friendly option to mitigate balcony leaks.
Regrouting with Epoxy Grout:
Regrouting with epoxy grout involves removing the existing grout, which is often not waterproof, and replacing it with a new grout that offers superior water resistance. Here’s a step-by-step guide on how to proceed:
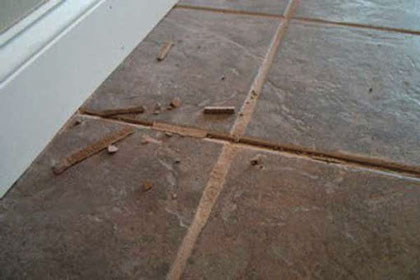
Assess the Condition: Begin by thoroughly inspecting the existing grout lines on your balcony. Look for any signs of damage, cracking, or deterioration that may be contributing to the leaks. Ensure the substrate beneath the grout is in good condition.
Remove Old Grout: Use a grout saw or rotary tool with a grout removal attachment to carefully remove the old grout. Take care not to damage the surrounding tiles or balcony surface. Remove all the existing grout to create clean and even grout lines.
Clean the Surface: Once the old grout is removed, thoroughly clean the surface using a mild detergent and a scrub brush. Ensure all debris, dust, and residue are completely removed. Rinse the area with clean water and allow it to dry completely.
Mix and Apply Epoxy Grout: Follow the manufacturer’s instructions to mix the epoxy grout. Epoxy grout typically consists of two components that need to be mixed together. Apply the grout using a grout float, making sure to push it into the grout lines and fill the gaps completely.
Clean Excess Grout: After applying the epoxy grout, wait for the recommended time specified by the manufacturer. Then, use a damp sponge or cloth to wipe away the excess grout from the tile surfaces. Rinse the sponge frequently to achieve a clean and smooth finish.
Cure and Seal: Allow the epoxy grout to cure according to the manufacturer’s instructions. Once fully cured, consider applying a grout sealer to further enhance the water resistance and longevity of the grout.
Regrouting with epoxy grout can be an affordable option to address balcony leaks. By removing the existing non-waterproof grout and replacing it with epoxy grout, you can improve the water resistance of the balcony surface. However, it’s important to note that this method may not guarantee a complete solution for all cases of balcony leaks. For more severe or persistent leaks, it’s advisable to consult with a professional to assess the situation and determine if additional repairs or waterproofing measures are required.
Full Balcony Restoration: A Comprehensive Solution to Address Leaks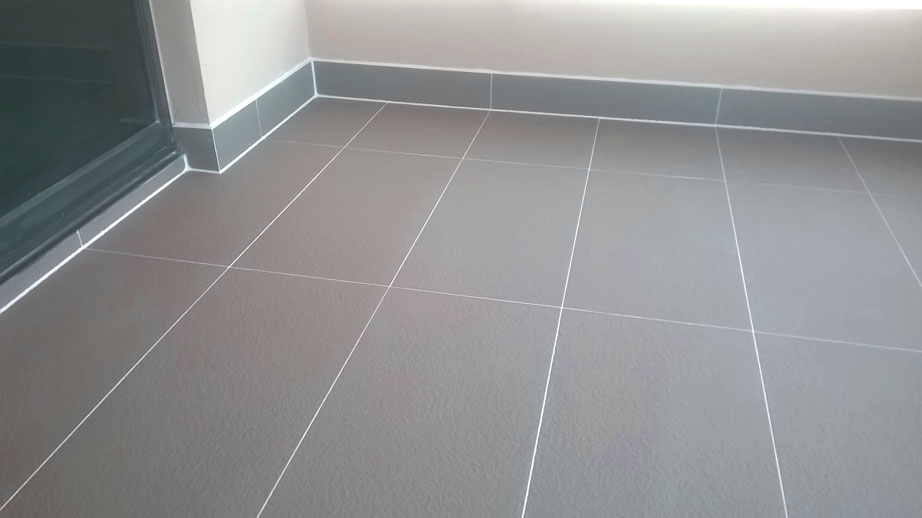
When balcony leaks persist despite temporary fixes, a complete restoration may be necessary to eliminate the problem once and for all. In this post, we’ll explore the involved process of a full balcony restoration to stop leaks. This comprehensive approach involves thorough demolition, removal of water-damaged elements, replacement with new materials, waterproofing, installation of proper drainage, and other essential steps to create a durable and leak-free balcony.
Demolition and Removal:
The first step in a full balcony restoration is to carefully demolish and remove all existing elements that are water damaged or compromised. This includes tiles, grout, balustrades, and any other components that may contribute to the leaks. By starting with a clean slate, you can ensure a thorough inspection and identify underlying issues.
Structural Assessment:
After the demolition, a detailed structural assessment should be conducted to identify any underlying problems with the balcony’s substrate, such as cracks, weakened surfaces, or inadequate slope for drainage. Addressing these structural issues is crucial to prevent future leaks.
Replacement and Repair:
Once the assessment is complete, replace or repair any damaged structural elements, ensuring the balcony’s integrity is restored. This may involve repairing concrete surfaces, reinforcing support structures, or replacing damaged framing.
Proper Drainage:
Creating effective drainage is essential to prevent water accumulation on the balcony surface. Install a new sloping screed to direct water away from the structure, ensuring it flows toward appropriate drainage points. This will help prevent water pooling and potential leaks.
Waterproofing:
Before installing new tiles, apply a high-quality waterproofing membrane to the entire balcony surface, including the walls and floor. Ensure proper adhesion and coverage to create a reliable barrier against water penetration. Follow local building codes and manufacturer guidelines for the waterproofing process.
Tiling and Finishing:
Once the waterproofing membrane is fully cured, proceed with installing new tiles on the balcony floor and walls. Use suitable adhesives and grouts to ensure a secure and water-resistant tile installation. Properly seal all corners and joints with a flexible and durable caulking material.
Balustrade Reinstatement:
If the balustrade was removed during the restoration process, reinstate it using suitable materials and techniques. Ensure proper attachment, stability, and compliance with safety regulations.
Quality Assurance and Maintenance:
After completing the restoration, conduct a thorough quality check to ensure all aspects of the balcony’s functionality and waterproofing are properly addressed. Regular maintenance, including routine inspections and prompt repairs, will help maintain the integrity of the restored balcony and prevent future issues.
Conclusion:
A full balcony restoration is a comprehensive solution to tackle persistent leaks and ensure a durable, water-resistant structure. By conducting a meticulous demolition, addressing structural issues, implementing proper drainage, applying reliable waterproofing, and using quality materials, you can create a balcony that withstands the elements and provides long-term enjoyment without the worry of leaks. Consult with professionals experienced in balcony restorations to ensure the project is executed to the highest standards, providing you with a functional, aesthetically pleasing, and leak-free outdoor space.
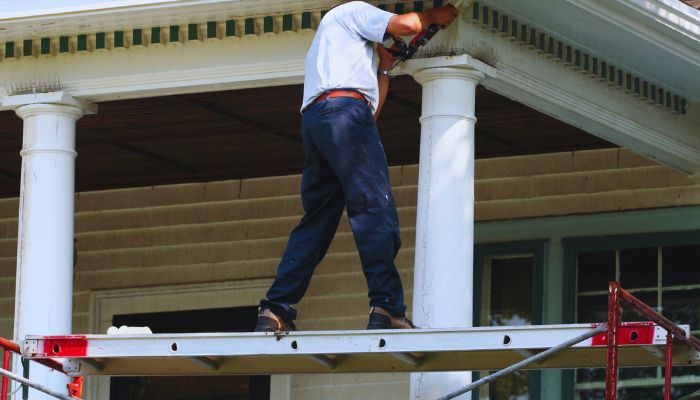
The Ultimate Guide To Outdoor Maintenance Maintaining the exterior of your home can transform your outdoor spaces from mere lawns [...Read More]
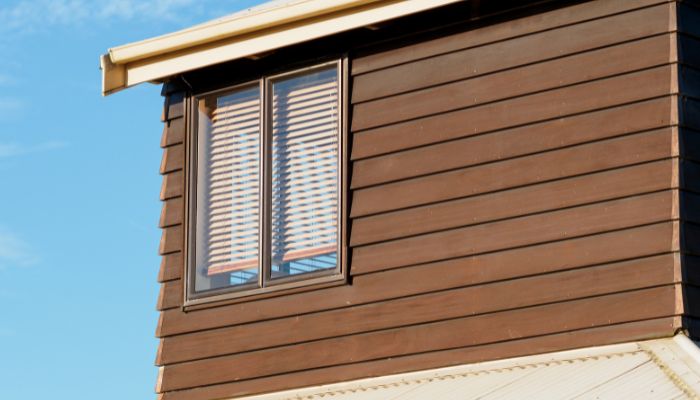
How To Maintain Weatherboards On A Budget Maintaining weatherboards is a crucial aspect of homeownership, especially for those who value [...Read More]
Cost Effective Weatherboard Maintenance In the realm of Australian homes, weatherboard cladding stands out not just for its aesthetic appeal [...Read More]