…But on the off chance you want to know so you can expand your knowledge-base a bit, I am proud to present you some good, old fashioned trade knowledge, straight from the front lines!
Let’s start off with shower bases.
There are many different types of shower bases available on the market today, ranging the full gamut from fiberglass to polymarble, to tiled or even vinyled! They all serve a specific purpose, and have particular aesthetic appeal to suit particular types of bathroom renovations. Polymarble shower bases and fibreglass shower bases were really popular in older-styled homes and were a cost-effective way of putting in a shower base. Tiled shower bases rose in popularity with the advent of modern homes and boutique apartment builds. Vinyled bases are more common in public areas, such as sporting change rooms and showers.
However, what I would like to focus on today is screed based showers.
Screeds offer a streamlined, smooth walk-in entrance into a shower that allows you to continue your tiling seamlessly throughout the bathroom. Not only are screeded, tiled showers a very classy touch, but they can also add value to your bathroom when done correctly.
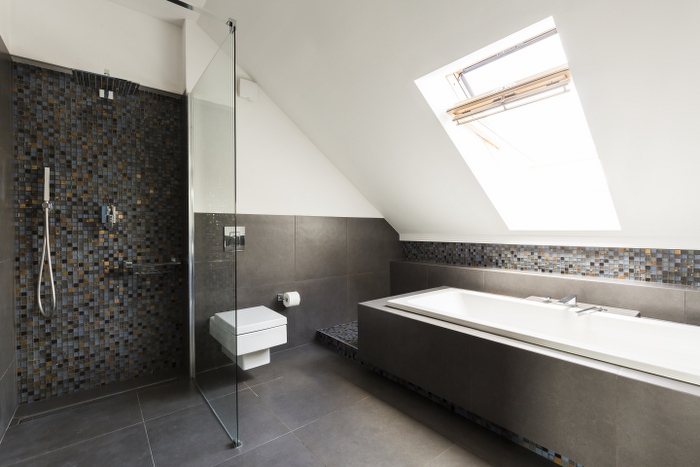
Right now you’re probably thinking to yourself ‘what on earth is a screed?’. Simply put, it’s a sculpted shower base that is built straight into your shower space. It encompasses the entire shower area and is made with a special mix of sand and cement, with waterproofing membranes above and sometimes below, depending on your circumstances. These are designed and sculpted in a specific way to give your shower base subtle ‘fall’, allowing water to drain away and not build up.
So, what is that ‘special mix’ that a screed is made from?
A screeded floor is usually made up of one part cement to between three to five parts sand, depending on the complexity of the shape required. When I first learned about screeds my initial reaction was ‘Why don’t they just use straight concrete? It’s extremely strong, and a sand/cement mix would not have the same strength to it.’ The answer was quite simple. It’s for the unique sculpting qualities that the cement gets when mixed with sand. This allows the end user to have a smooth, level surface to apply the waterproofing membrane, and chosen flooring.
Screeds can be built on top of existing floors if a recess in the floor that would allow it to sit flush with the rest of the room is not available. Best of all, when combined with a custom built shower screen, it can be made to any shape and size to suit your ideal shower! Only have room for a standard 900mm x 900mm shower? No problems. Want a massive dual rain showerhead shower with a built in seat and recesses for all your products? Easy!
When sculpting the screed, there’s a fine balance needed to get the fall correct from floor level to the drainage outlet. Ideally the screed should have a subtle fall; one that isn’t overly obvious visually, but has enough of an angle that the water does drain away without building up at all.
Waterproofing the screeded shower base
To stay compliant with the Building Code of Australia, your shower and other wet areas in your home will need to be correctly waterproofed. You’ll need to ensure that you have waterproofing on top of the screed, the shower walls and entrance area of the shower, as well as the rest of your bathroom. If the screed is built above another floor, you’ll want to waterproof underneath the screed as well. We solely use Ardex waterproofing membranes, as the quality of their membranes is second to none and provide the best waterproofing for every situation.
Tiling the screeded shower base
Once the screed is done and the waterproofing membranes have cured, the shower can be tiled over. The length of time between waterproofing and tiling really depends on the membrane that has been used, and this can vary from just a few hours to a few days. You need to make sure that if you’re doing your bathroom renovation yourself, you make sure you read the Product Datasheet for your specific membrane and allow for enough curing time or you will affect the structural integrity of the waterproofing membrane, rendering it useless. Otherwise, if you’ve engaged separate trades to take care of your waterproofing and tiling, there will need to be clear communication between the two so that the tilers do not damage the membrane. This is a pretty key step to stay on top of, as fixing leaking showers and bathroom water damage is an incredibly costly problem to deal with later down the track.
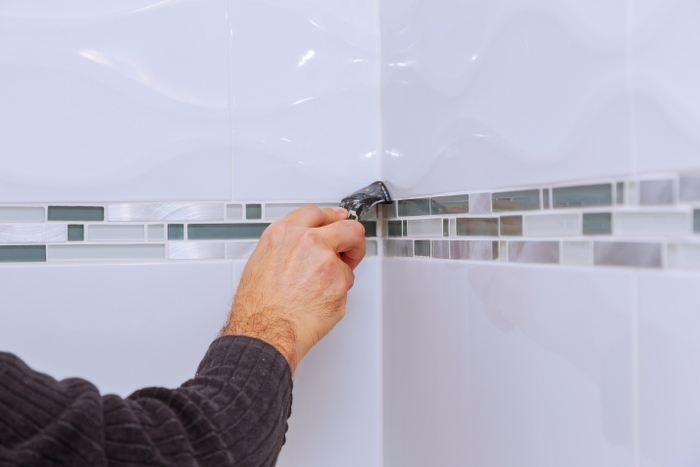
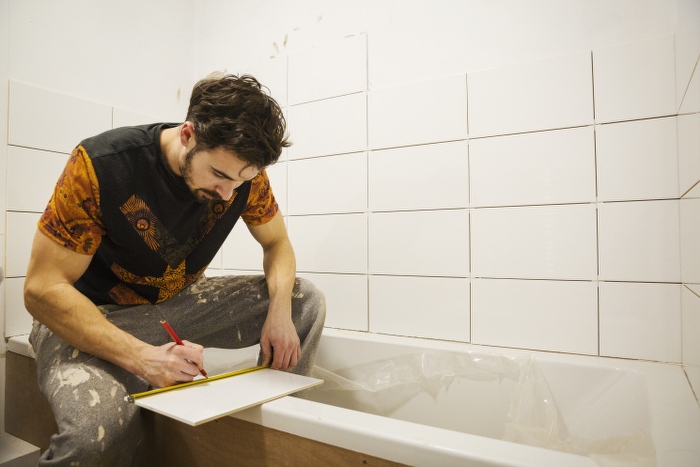
Now, as mentioned earlier one of the most popular aspects of having one of these screed based showers is the ability to continue your floor tiling straight through into the shower itself. It gives a clean, modern aesthetic to your bathroom and helps you maintain continuity in the lines of the room. It also helps you to draw your attention to tiled feature walls. So, the last thing you want is for your shower tiling to stand out from the rest of your floor in all the wrong ways because you haven’t continued the spacing of your tiles correctly. Make sure that you plan out your shower tiles so that they continue the visual lines from the tiling in the rest of your bathroom. In most scenarios this will mean that you’ll have to cut tiles down, and you’ll want to make sure you’ve planned out your tiling before you start laying them so you know exactly what needs to be cut before you start. You can then evenly mortar your floor using a trowel (doing so in sections; you don’t want to cover your entire floor all at once or the mortar may dry out before you get your tiles in position).
How do you space your tiles evenly?
You’ll notice on professional tiling jobs that all of your tiles are evenly spaced and form beautiful straight lines of grout. Professional tilers don’t just ‘eyeball’ the positions of their tiles; they use proper spacers to ensure that all the lines are precise and correct. These spacers are little plastic crosses with precise widths that allow you to maintain uniform gaps between your tiles. You position two spacers per tile edge (set in for each side) so that the next tile butts up against the spacers to get completely even lines. Once all the tiles are laid, you need to wait a few days for the mortar to set. Make sure you give it the recommended amount of time before you begin grouting, as placing pressure on the fresh, unset mortar will lift and reposition your tiles and damage the mortar, and you’ll no longer have a nice, flat surface. Once set, simply apply the grout using a rubber trowel and clean off the excess grout once it’s all in place, and you’re done!
Need more home maintenance tips? See our article on home cleaning tips.